In this article, we show you how to setup the integration between Tātou and Xero Australia.
This is a technical article.
Currently, the native integration is composed of two main parts:
|
Entity |
Description |
Direction |
|---|---|---|
|
Employee |
Creating, updating or setting a termination date* for an employee on Xero automatically does the same in Tātou. * Setting a termination date makes the employee inactive in Tātou. |
Xero → Tātou |
|
PayPeriod |
Creates Xero Pay run and updates Payslips based on Tātou timesheets. |
Tātou → Xero |
To enable the integration, it’s necessary to create a Connection (authentication) and Webhooks in Tātou. Please follow the next steps to set them up correctly.
Before you start
-
Make sure you have a Xero account with Payroll permission;
-
Make sure you have Administrator permission in Tātou;
-
If not enabled yet, ask Tātou team to enable the RESTful API to your account;
-
If you already have employees in Tātou, make sure the First name, Last name, and e-mail are identical in both Tātou and Xero.
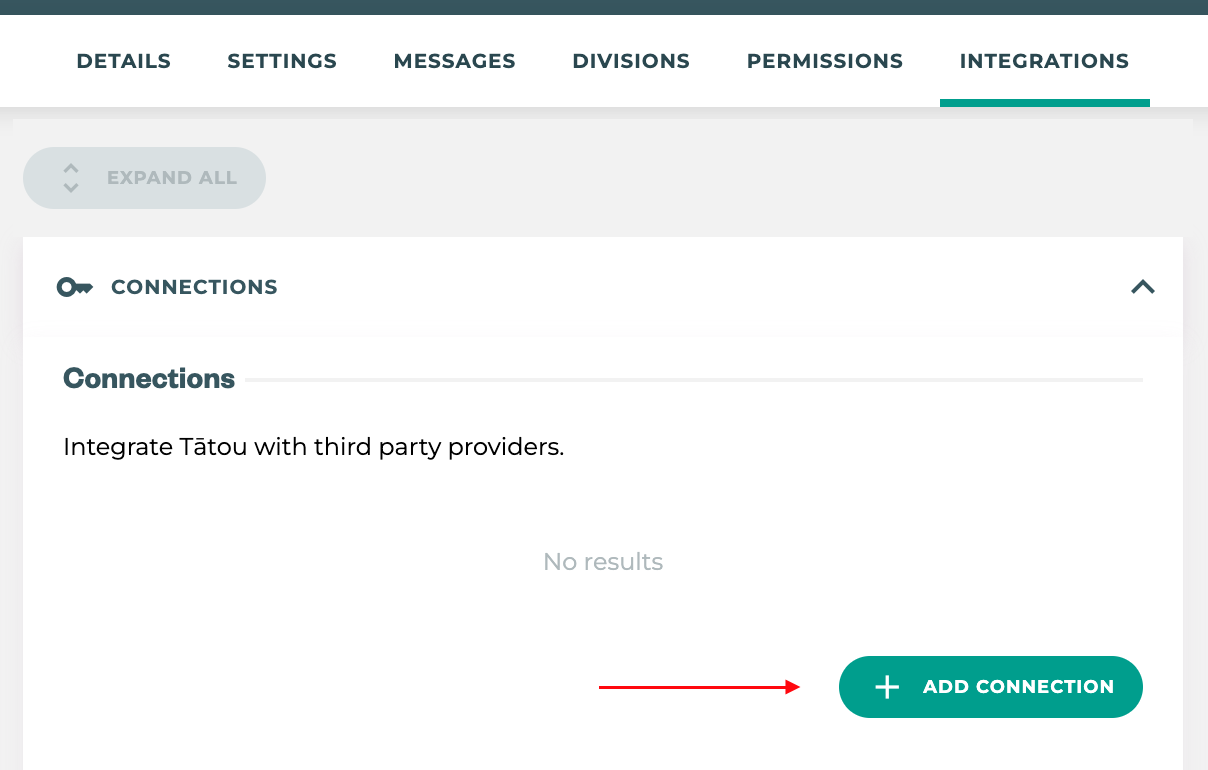
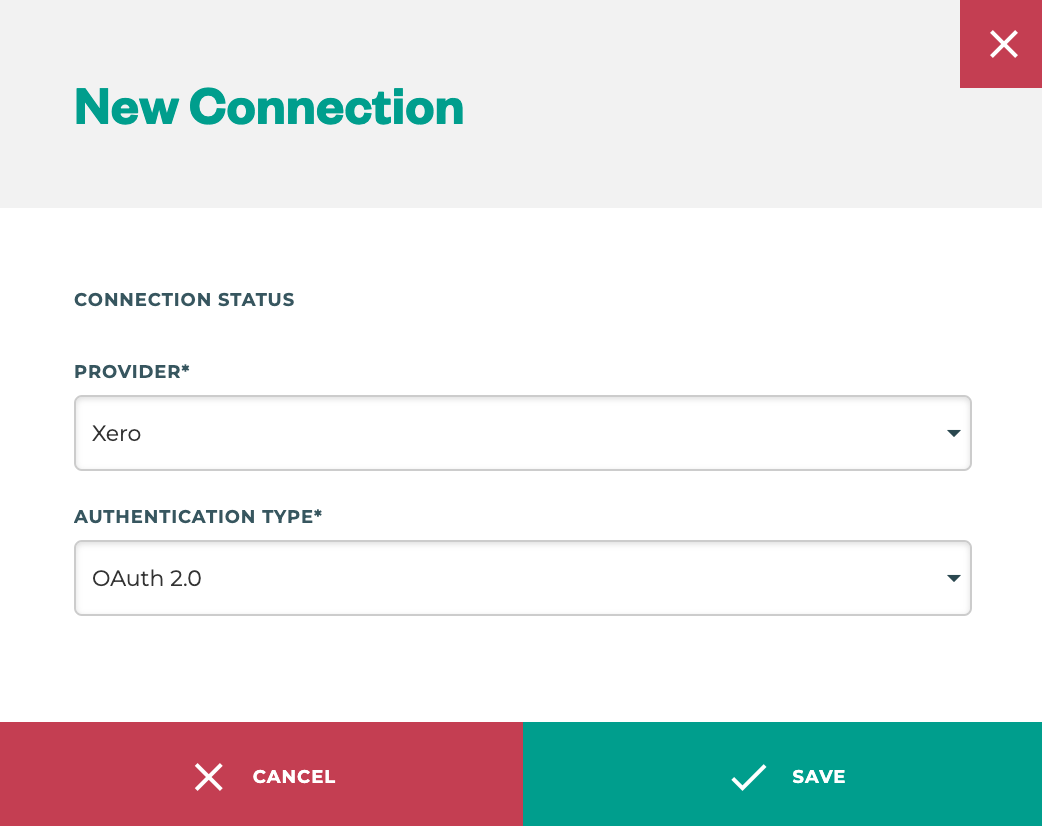
Setting a new connection with Xero
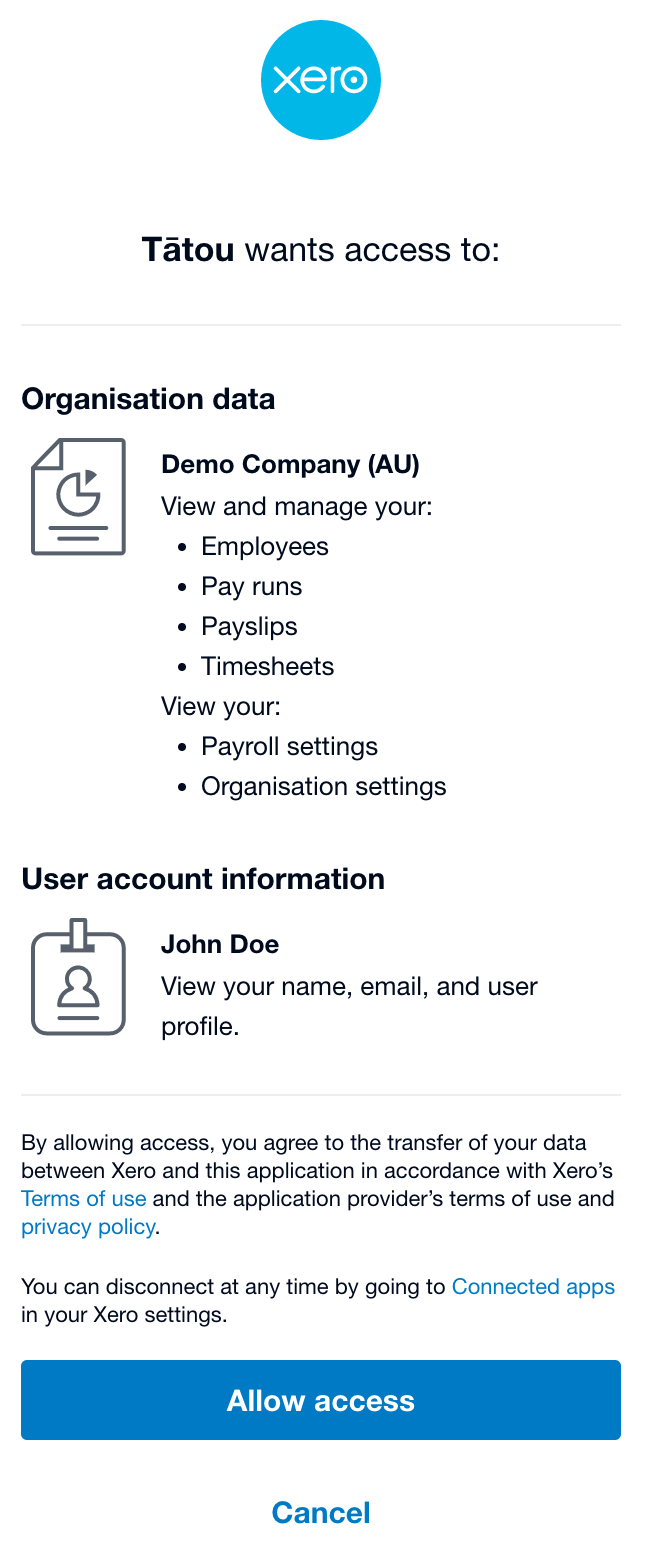
Xero uses OAuth 2.0 as the authentication method. To connect both systems, you need to create a new Connection in Tātou.
-
Navigate to Organisation / Integrations / Connections and create a new connection.
-
Select Xero as your provider and save
-
Click on “Connect” to start the authentication process with Xero
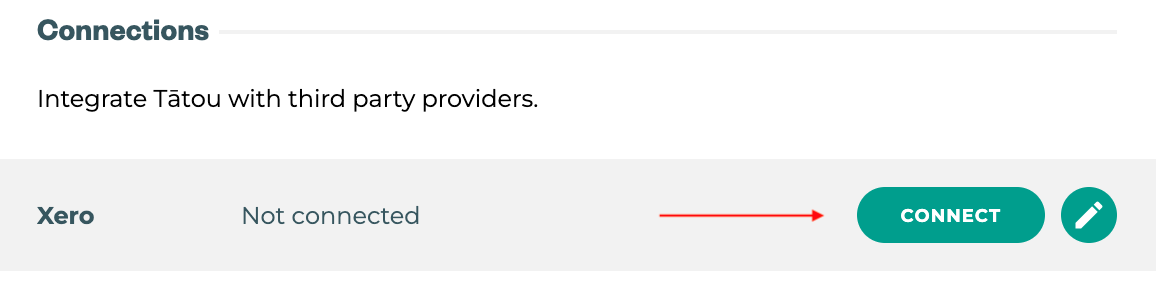
-
This will redirect you to authenticate with your Xero account. Please review the necessary permissions and allow access.
-
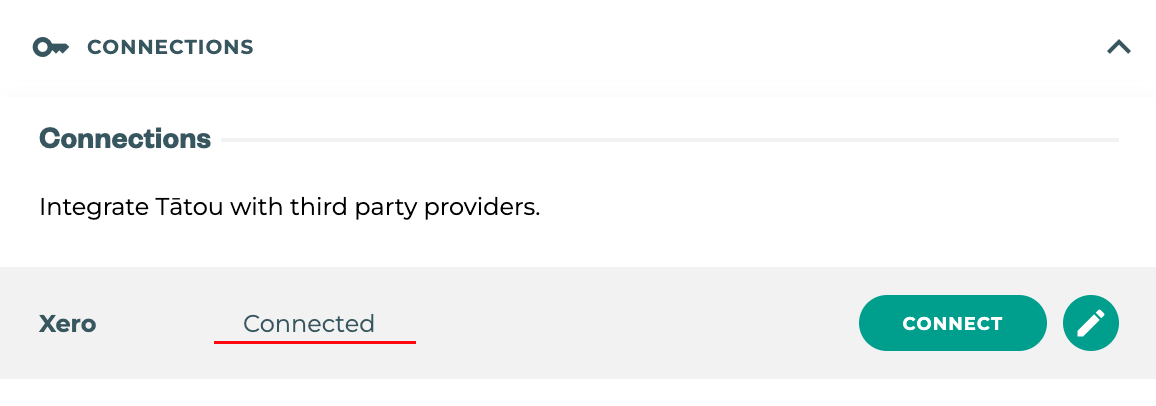
After a successful connection, you should be able to see the “Connected” status:
Webhook configuration
This integration requires two webhooks to be set. To know more about how Tātou webhooks work, please click here.
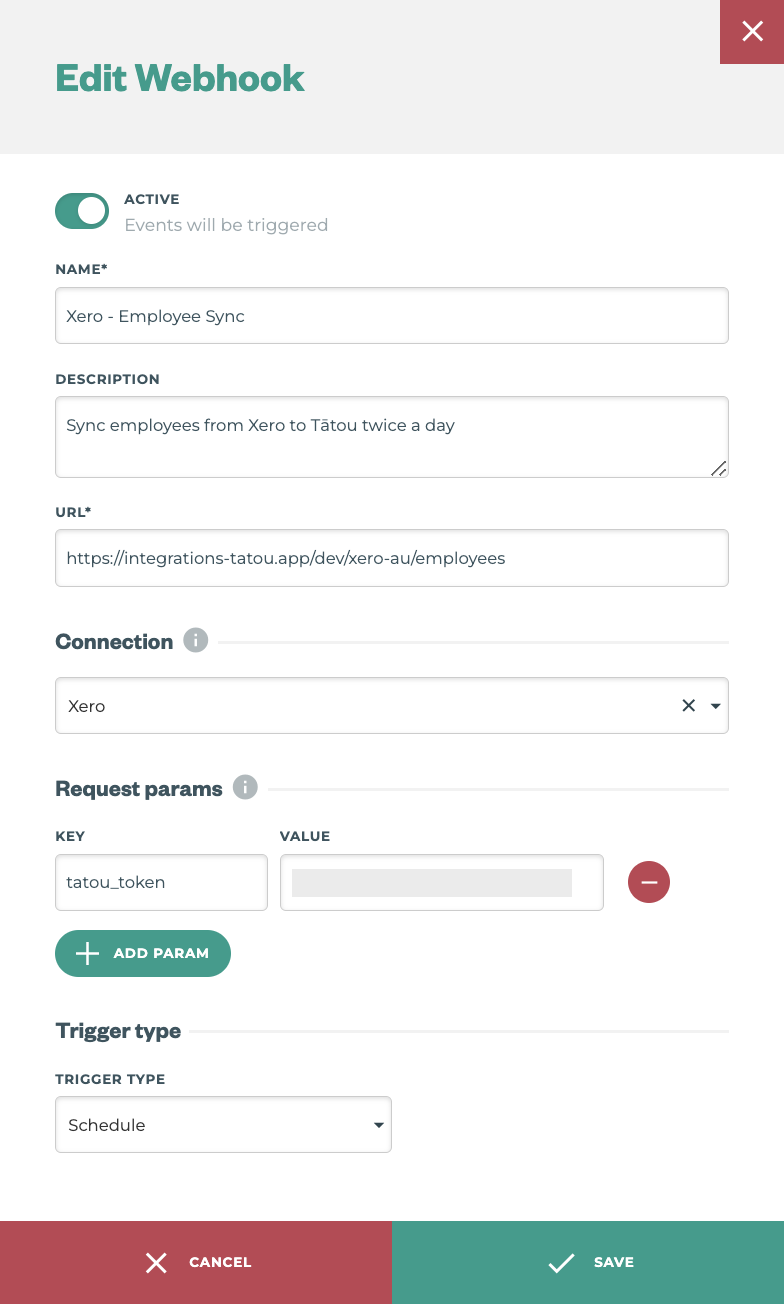
Employee webhook
Webhook configuration:
|
Field |
Value |
|---|---|
|
Name |
Xero - Employees Sync |
|
Description |
Sync employees from Xero to Tātou twice a day |
|
URL |
https://integrations-tatou.app/production/xero-au/employees |
|
Connection |
Use the previous connection created (Xero) |
|
Request params |
|
|
Trigger type |
Schedule |
This is how it should look:
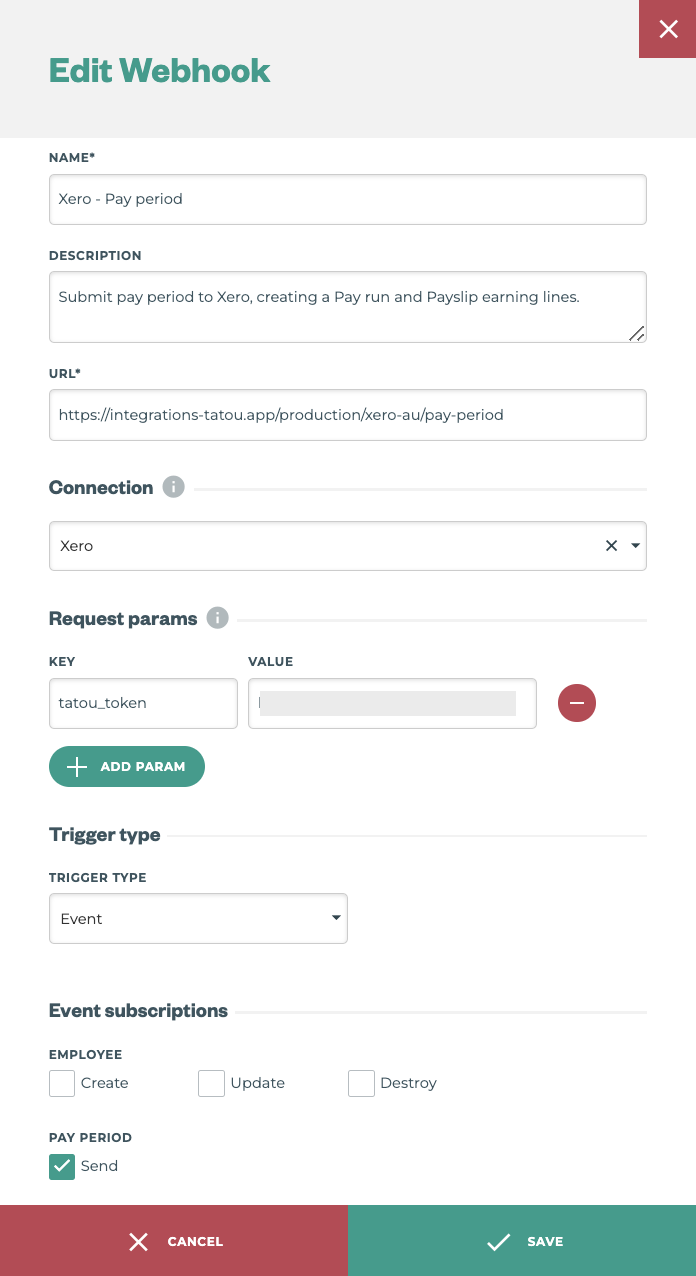
Pay period webhook
Webhook configuration:
|
Field |
Value |
|---|---|
|
Name |
Xero - Pay period |
|
Description |
Submit pay period to Xero, creating a Pay run and Payslip earning lines |
|
URL |
https://integrations-tatou.app/production/xero-au/pay-period |
|
Connection |
Use the previous connection created (Xero) |
|
Request params |
|
|
Trigger type |
Event |
|
Event subscription |
Pay Period - Send |
This is how it should look: