Payroll with Xero Australia
In this article we show how to use Xero AU integration with Tātou.
Need to setup the integration? Please see Getting connected with Xero Australia
Employees
The employee integration is unidirectional, from Xero to Tātou. You can create, update and set termination date* to employees on Xero and it will reflect on Tātou.
Setting termination date to employees on Xero will make them inactive on Tātou
To be able to link the profiles, the integration uses the employee’s First Name + Last Name + Email. If you created a employee manually on Tātou, make sure these three are exactly the same in both platforms. If you have an employee with different name or email, it can create duplicate records in Tātou.
Important: Tātou employees can have Personal email and Professional email. The email used for the integration is the Professional email as image below:
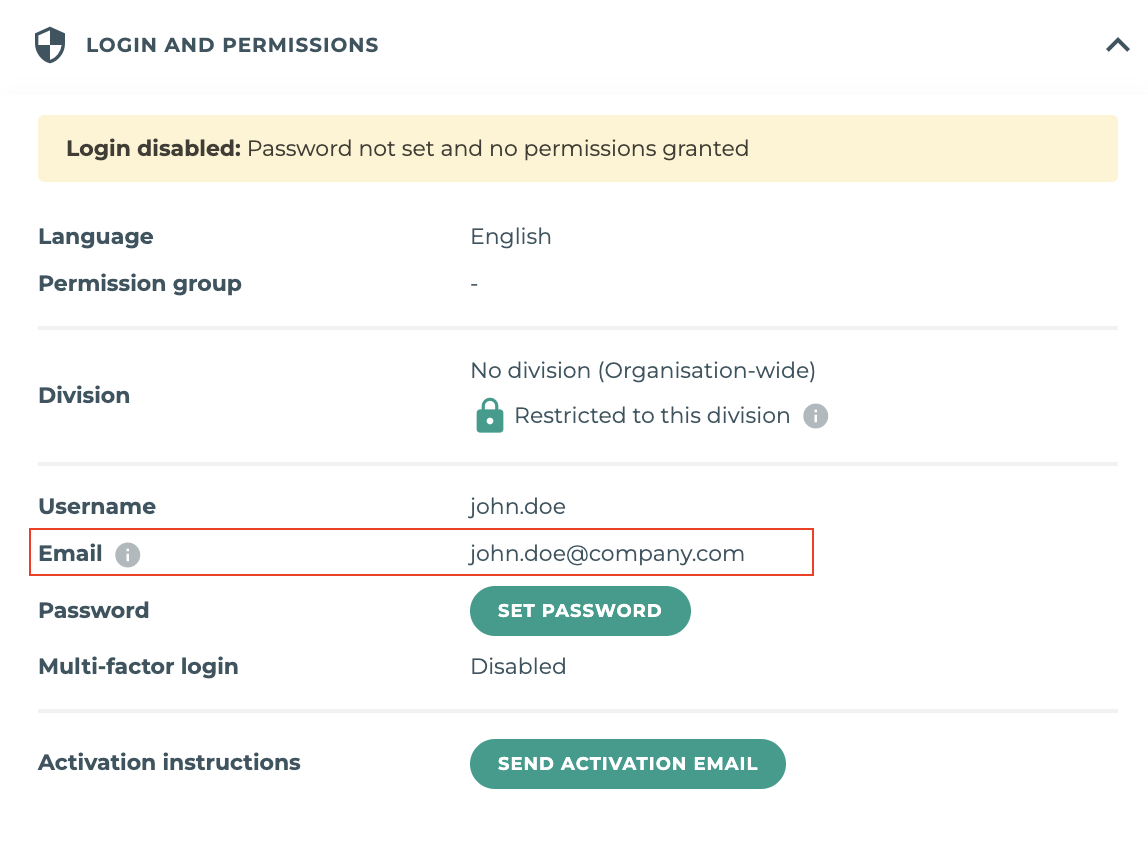
Employee - Login and Permissions
The integration works twice a day (12am and 12pm - New Zealand time zone).
To check whether employees were created / updated from Xero, you can use the Activity log, as image below:
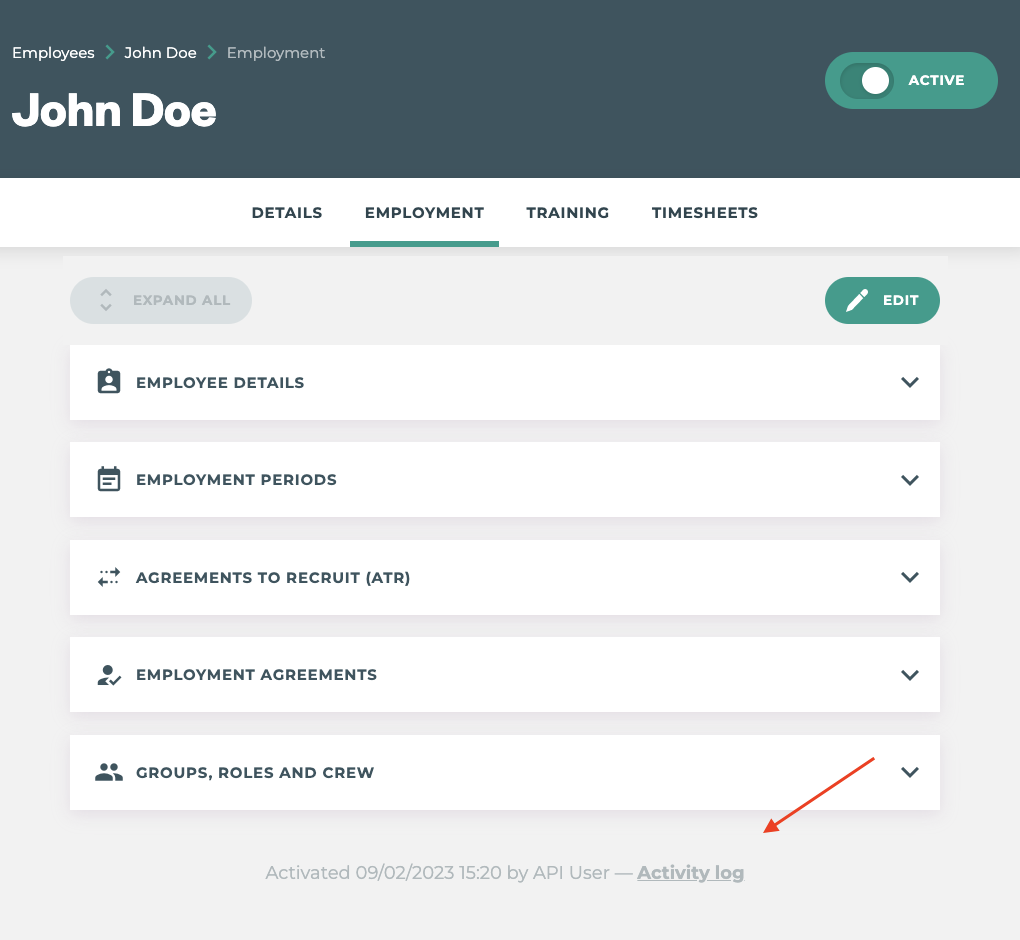
Employee profile - Activity log
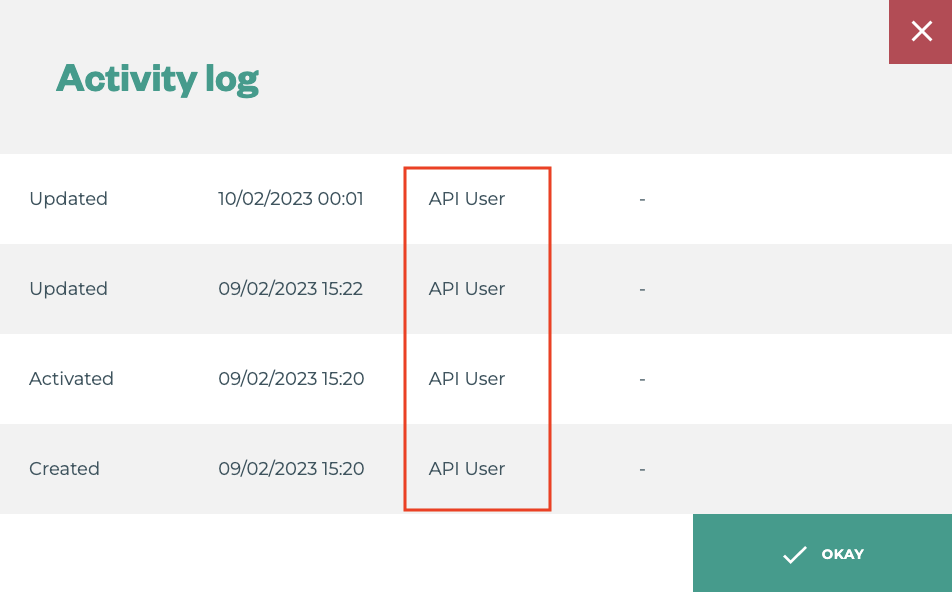
Activity log - API User
You can also check wether an employee was created / updated with Xero information by looking at the Tātou Staff Id. The integration uses the Xero unique identifier code to link employees for future usage (eg. Pay period integration).
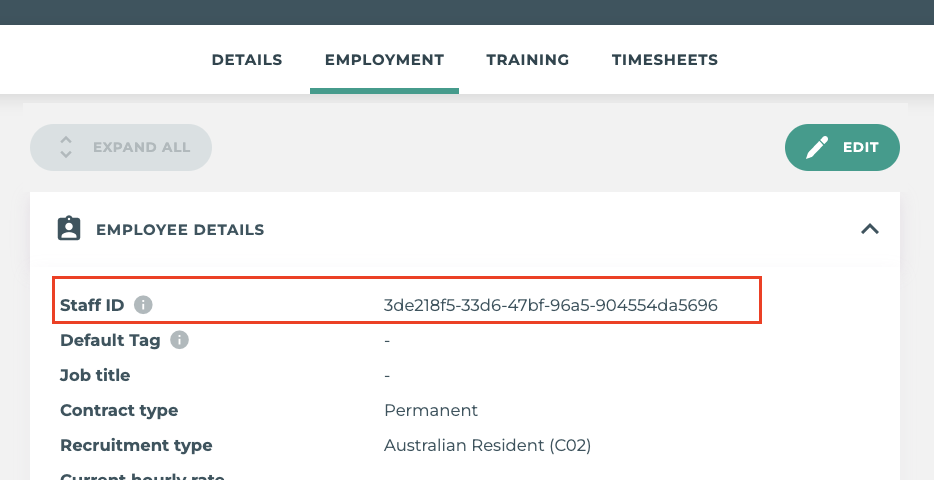
Employment
Included fields
Status
Staff Id
First name
Last name
E-mail
Gender
Phone number
Birth date
Job title
Start date
Passport Nationality: default to “Australia”
Address (address, city, region, country and postcode)
Roles: It uses the default organisation role (eg. Crew)
Contract Type: default to “Permanent”, it uses Xero tax declaration
Recruitment Type: default to “Australian employee”, it uses Xero tax declaration
Hourly rate: It uses Xero Pay Template for the Employee (more details below)
Emergency contact(this is currently not available on Xero API for integration)
Hourly rate integration
The integration uses the Employee Pay Template to get the hourly rate. If you want to control the hourly rate on Xero, you need to create a new Pay Item in your Payroll settings as well as a new Pay Template with Earning line for each employee as below:
Xero Pay Item
Create a new Pay item of type Ordinary Time Earnings: Xero → Payroll → Payroll Settings → Pay Items. Leave the Rate per Unit empty if you want to control hourly rate by employee, or put a rate if you want to control by Pay Item.
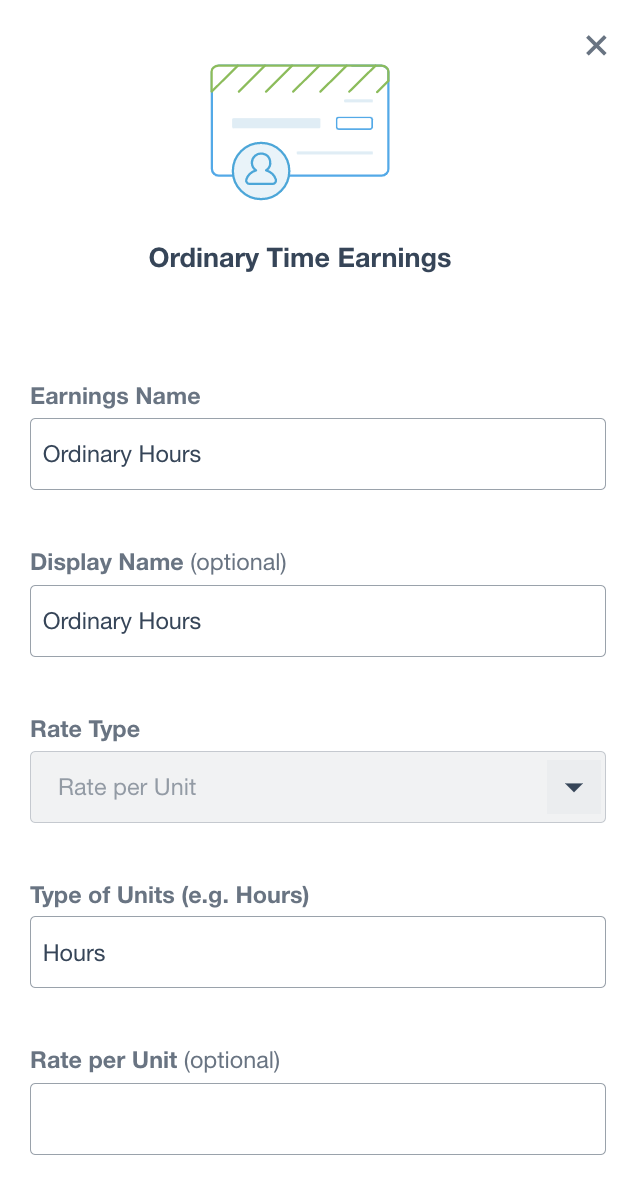
Xero Pay Items
Xero Employee - Pay Template
You can link the recent “Ordinary Hours” Pay item created to an Employee. Go to Xero → Employee → Employment → Ordinary Earnings Rate and select the appropriate record as image below:
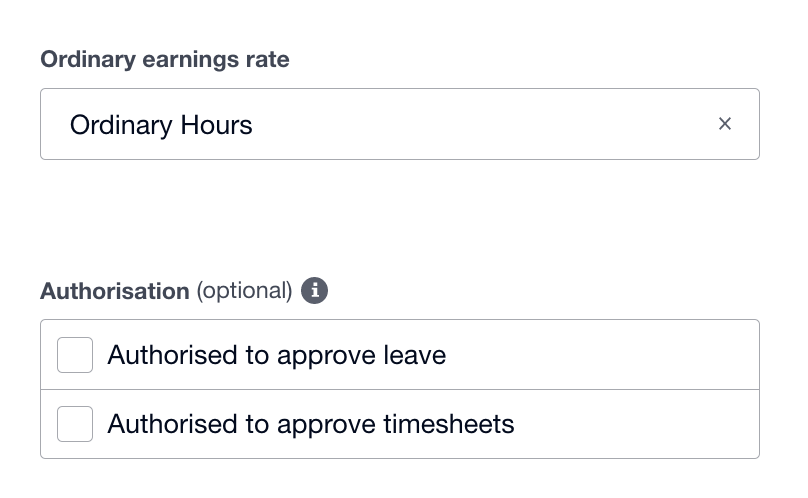
Xero Employee Employment
If you choose to control the hourly rate by employee, you can add it to the Employee Pay Template. The integration will use any rate added there.
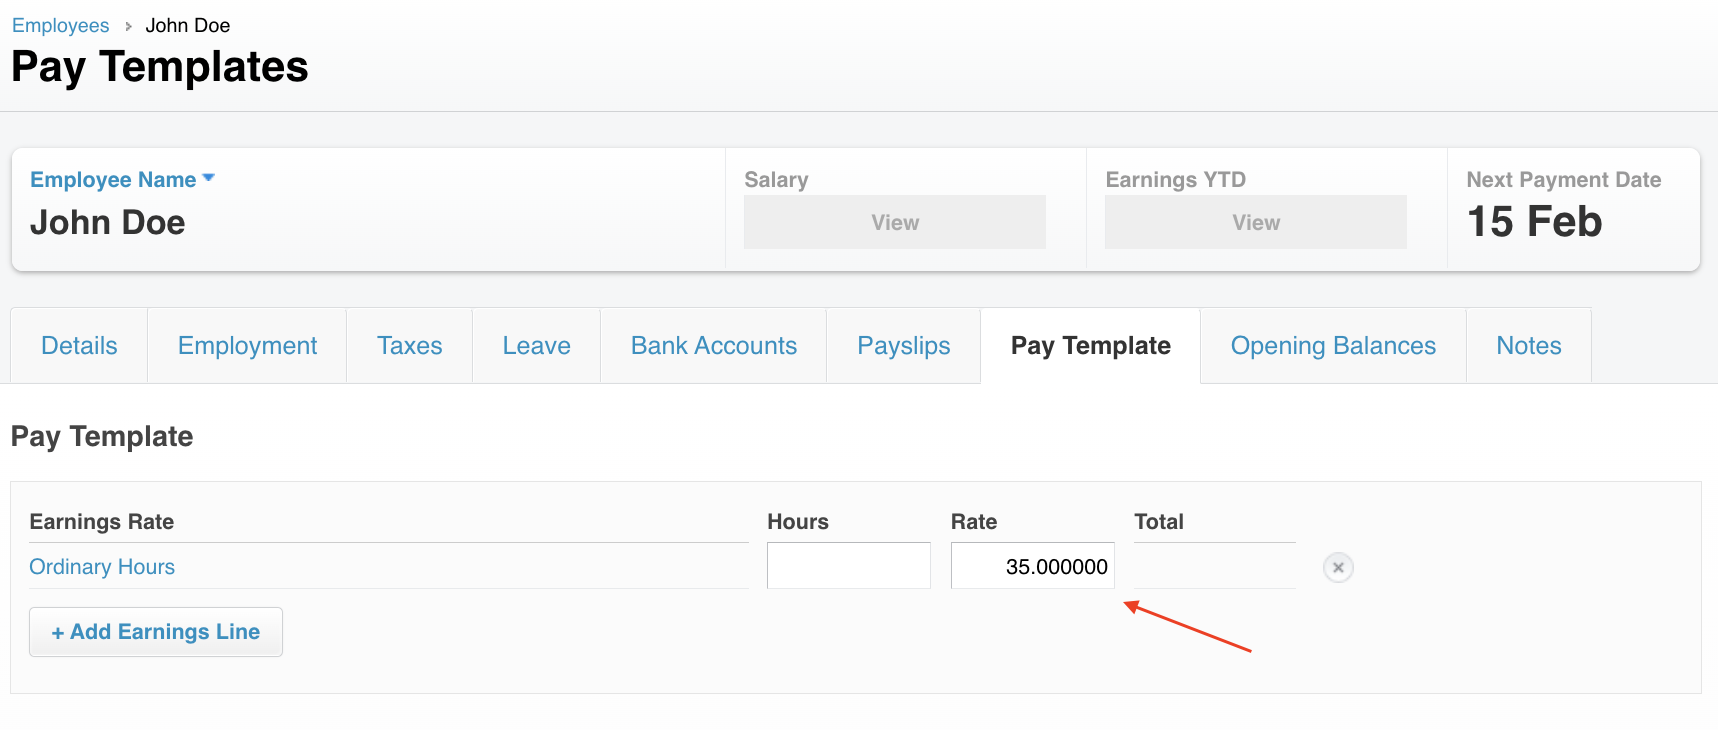
Xero Pay Template
If both Employee Pay Template and Pay Items are set, the Employee Pay Template will have priority to set the employee hourly rate on Tātou.
Pay Period (timesheets)
Earning types
As part of the setup to sync timesheets, you need to make sure that all Earning Types on Tātou are correctly linked with Pay Items on Xero.
Depending on your setup, Tātou can generate these types of earnings: Hourly, Contract (Piece rate), Topup, Overtime and Paid rest break. In order to get those earnings on Xero as Payslips earning lines, you need to set up corresponding Pay Items (Xero → Payroll → Payroll Settings → Pay Items → Earnings).
Set up the following pay items:
Earnings Name | Rate Type |
|---|---|
Ordinary Hours | Rate per Unit |
Piece rate | Rate per Unit |
Agreed hours topup | Rate per Unit |
Topup | Fixed Amount |
Overtime | Fixed Amount |
Paid rest break | Fixed Amount |
Earning types are matched by name. So you can configure the other fields as necessary for your organisation.
Earning types by Task Code
So let's say that you want your employee’s payslip to describe all piece rate work by task, instead of just “Piece rate”, this is also possible! The integration links Tātou Task Code with Xero Pay Items.

Xero Pay Items / Earnings
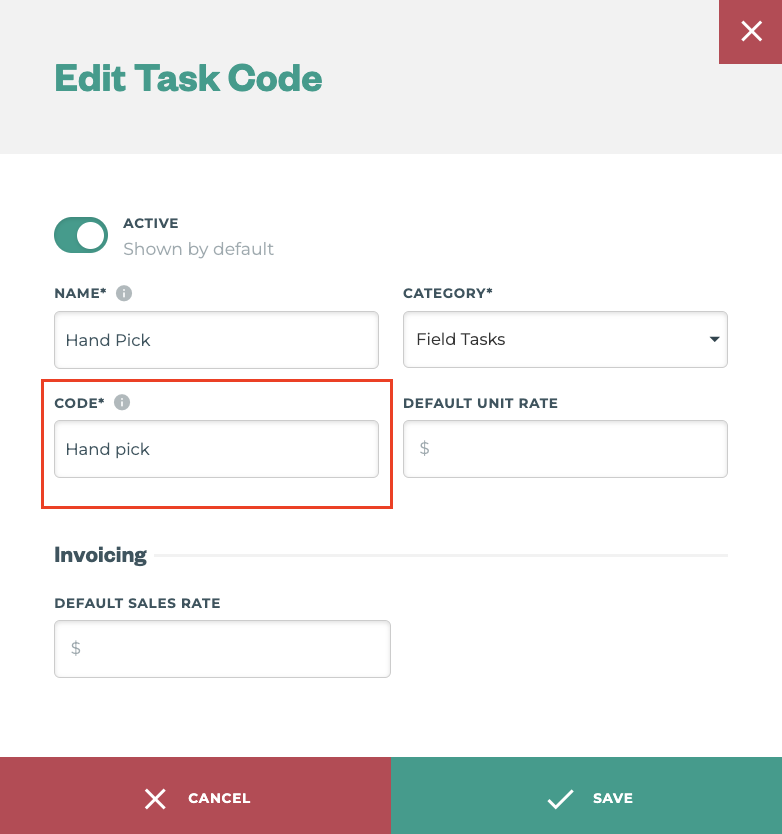
Task Code
The integration will always get the more specific Pay Item when available. It’s important to note that the default “Piece rate” is required for the integration, as if no task found, it will be used.
You can use the same for all Earning Types. So you can potentially have “Ordinary hours | Pruning” for your supervisors for example.
Selecting employees to send payroll data
During the sync process the integration will ignore employees who the Contract Type is “Contractor”.

Employee details
Syncing a pay period
Before you sync your first pay period, make sure you Calendars on Xero match the pay frequency (eg. Weekly). Also check the Calendar next pay period, it needs to be in sync with the period you want to send.
To check and sync a pay period, go to Tātou → Reporting → Pay Periods and Send to Payroll
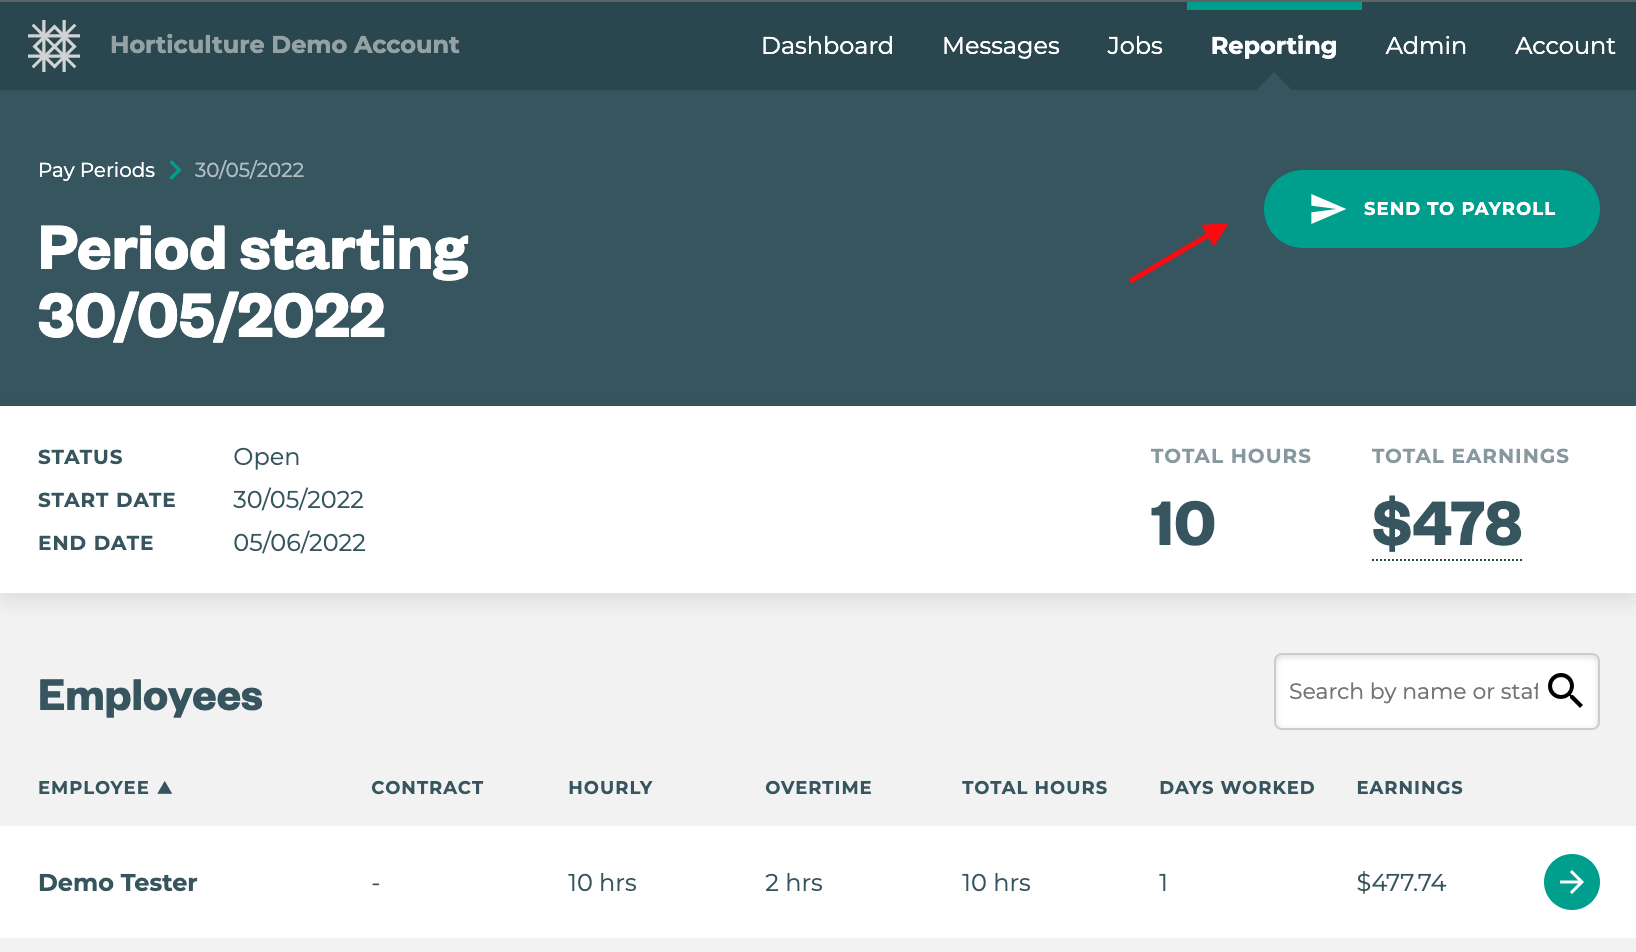
On Xero it will create a new Pay run and will update the Payslips with the Earnings from Tātou. It will also keep any earnings rates that you added to the Employee Pay Template on Xero. So the result will be a mix of any default earnings set on Xero and the Earnings from Tātou.
Troubleshooting common Xero integration errors
“Missing Authentication Token”
Please check if you follow all the steps from How to: Setup the Xero AU integration.
Possible causes:
Wrong link on the webhook configuration
Missing the Request params
tatou_tokenExpired connection with Xero
“This payslip has a negative net payment value”
This can happen when the employee has more deductions than earnings. Check the Payslips created. After fixing any deductions or missing jobs for that employee, delete the draft pay run and send it again from Tātou.
“No Earning Rate *** found on Xero”
When setting up the integration, you need to create at least 5 types of Pay Items / Earnings on Xero:
Ordinary hours
Piece rate
Topup
Overtime
Paid rest break
If any of those are missing, you will receive this message. Please check the Pay Period section of this document to learn more.
“There can only be one draft pay run per calendar”
This can happen when you are submitting the pay period to Xero, but you already have a draft Pay run there. When submitting a pay period, the integration creates a new Pay run as draft, so if you need to fix something and send it again, you need to manually delete the existing draft pay run on Xero.
