Before starting
Before starting, make sure you have the feature enabled for your organisation.
Login to the Office app, navigate to Operations → Invoices. If this section isn’t listed, please contact us to enable the feature.
Create an Invoice from the Jobs Page
Login to the Office app, navigate to Jobs Menu → All Jobs Page.
Filter by date, client, task etc to find the relevant jobs.
-
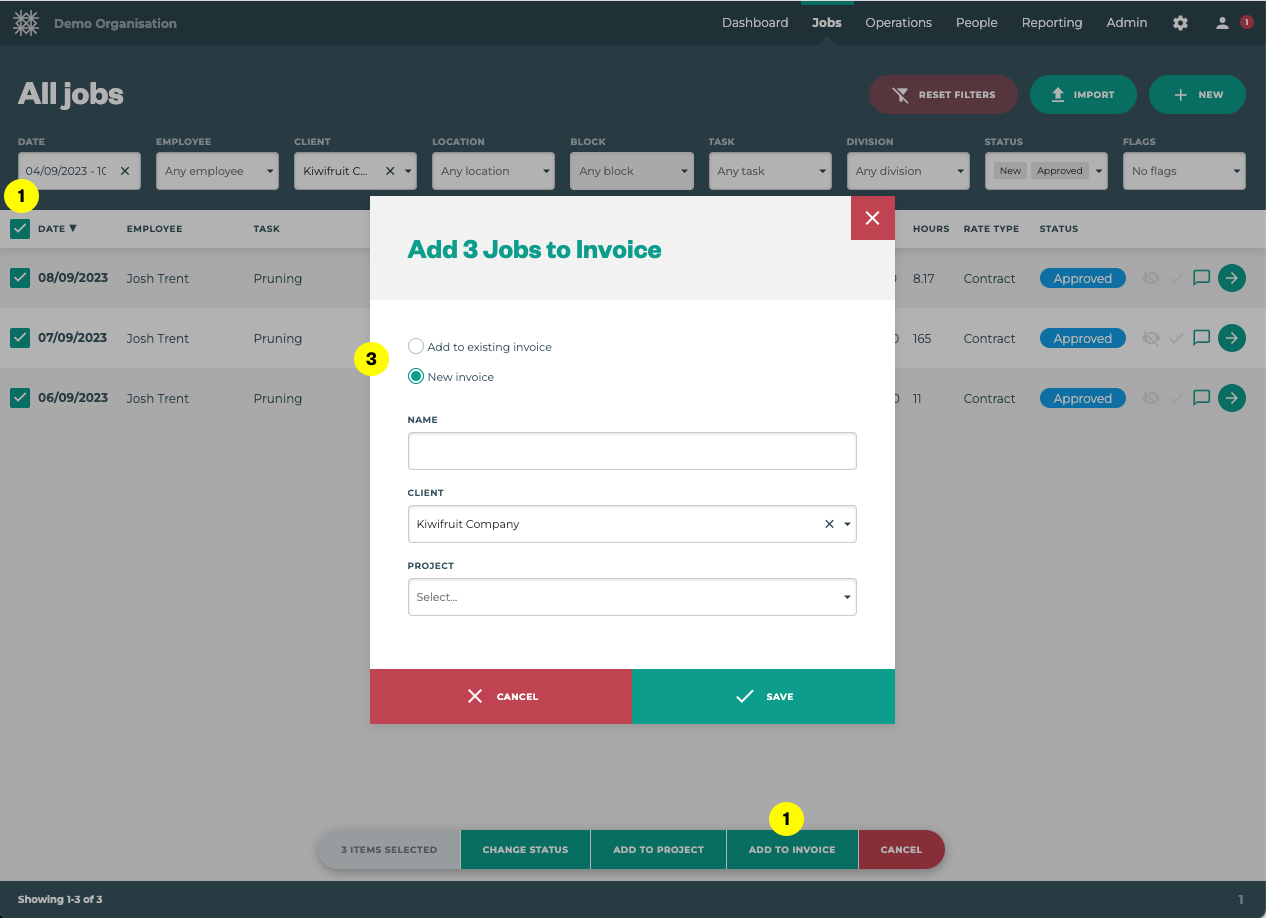
Using the checkboxes on the left hand side, select the jobs you would like to invoice
-
Click on ‘Add to invoice’
-
Select ‘New Invoice’
-
Add a name for the invoice; a helpful reference e.g. ACME WE 10/09/23
-
Check the client and if relevant, link to a Project
Jobs can only be added to one invoice
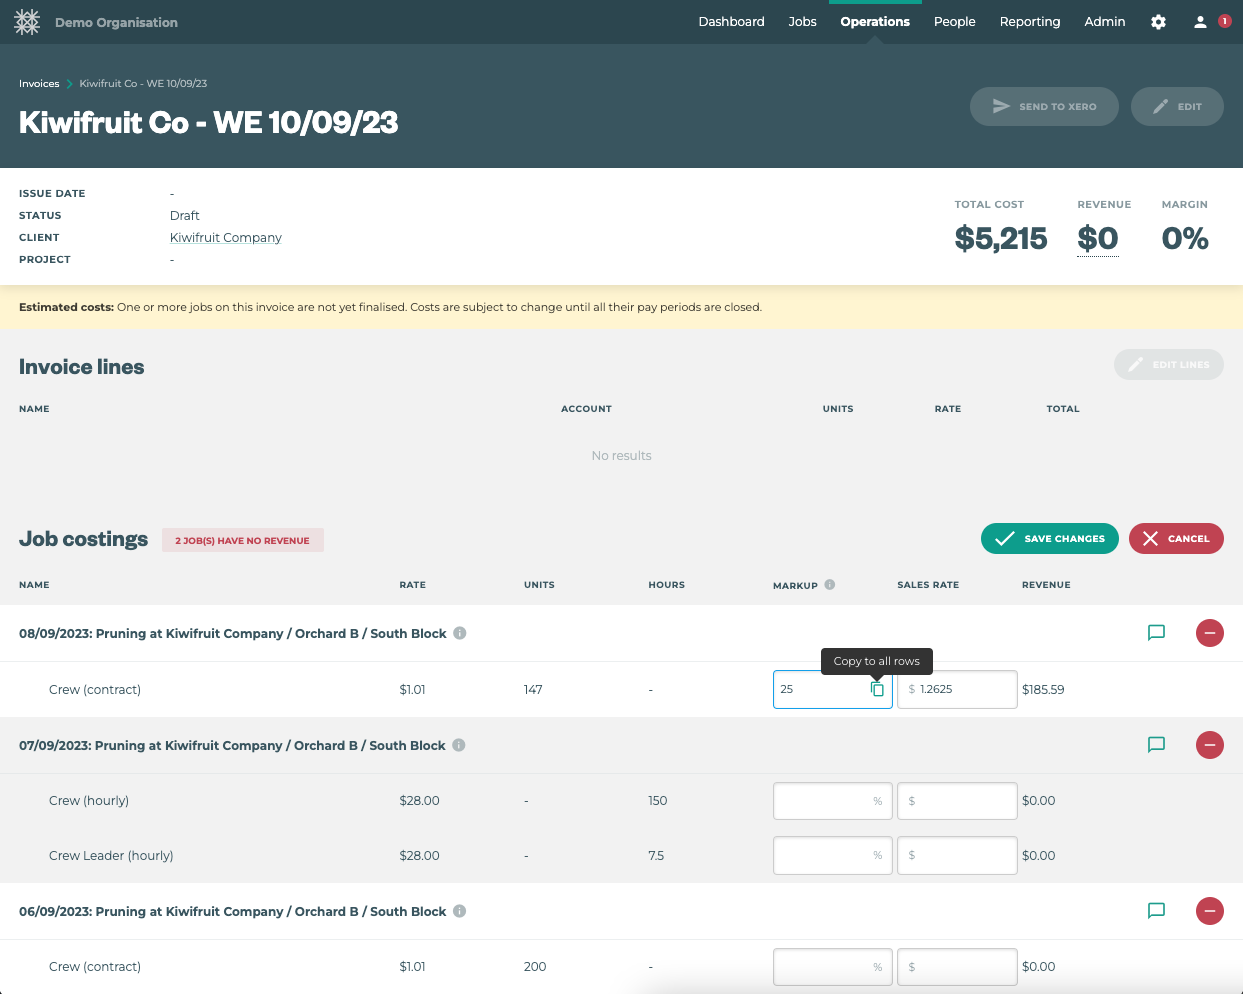
Review job costings
Once created, the invoice screen will automatically open. To see all invoices navigate to Operations Menu → Invoices.
-
Click ‘Edit job costings’
-
Enter a markup % or enter the sales rate for each job to calculate job revenue
-
Click ‘Save changes’
Pro Tip: To save time preset your sales rates;
-
People Menu → Roles Click edit to add a default hourly rate under ‘Invoicing’
-
Admin Menu → Tasks Click edit to add a default hourly or unit rate under ‘Invoicing’
To see more information about a job
-
Hover over the
-
Click the speech bubble to see any job notes
Generate invoice lines
Now the jobs have been costed/priced the invoice lines can be generated.
-
Click ‘Edit lines’
-
Choose your settings to generate the invoice lines; Jobs can be merged or split by task, location and block. This allows for both condensed simple invoice lines or detailed invoice lines.
-
Click ‘Generate invoice lines’
-
Additional invoice lines can be added ad hoc using ‘+ New Line’
-
Check the description name, Xero account (optional) Units, Rate etc and click ‘Save changes’
You can now see the invoice summary; total cost, revenue and margin etc for final review.
Invoice lines not what you expected? Don’t worry, use the
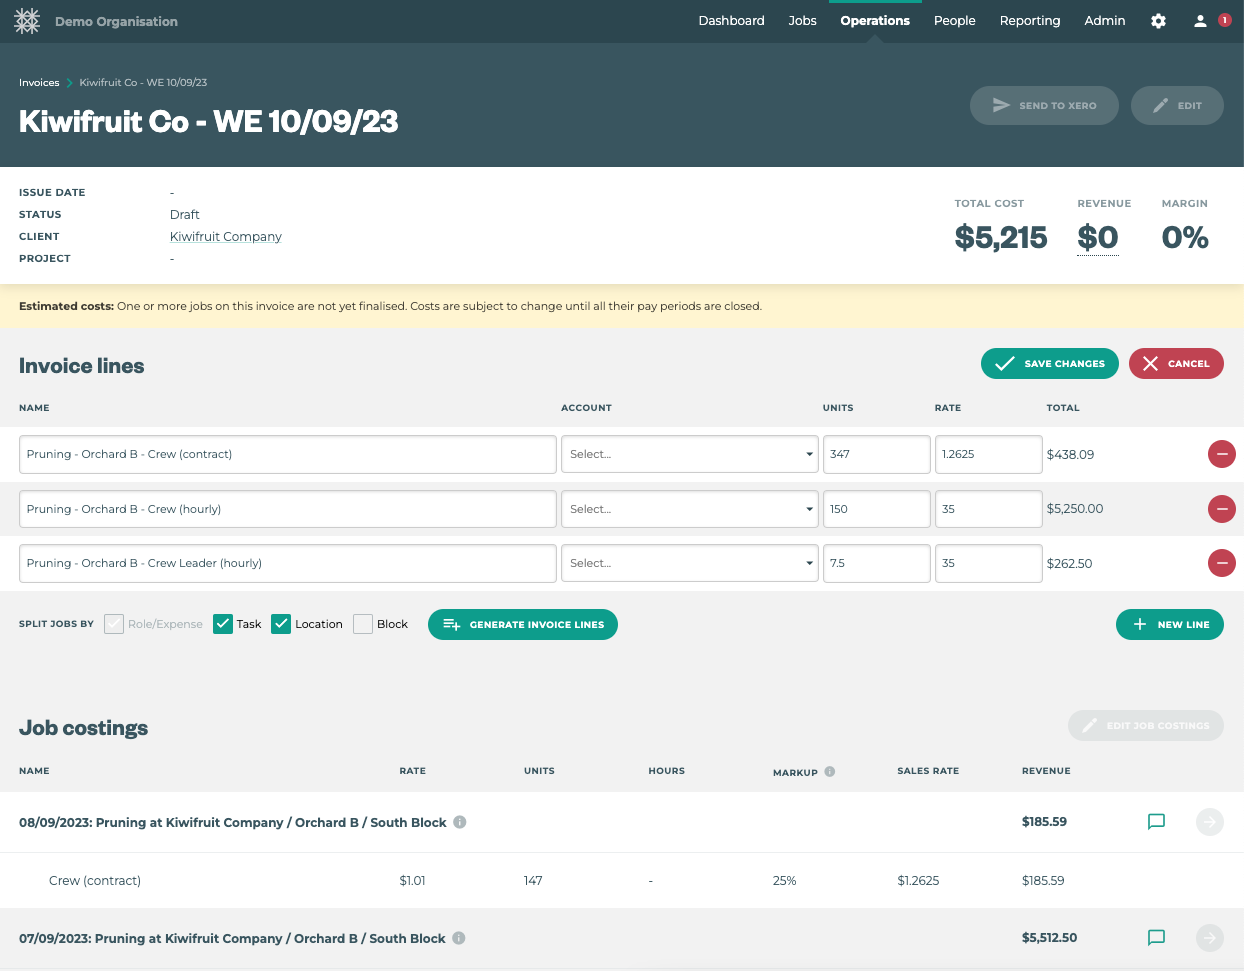
Invoice Lines created using the + GENERATE INVOICE LINES button, will always be separated by the Roles on the Jobs. If you would like 1 Invoice line for an item use the + NEW LINE and manually input the correct line data.
Send to Xero
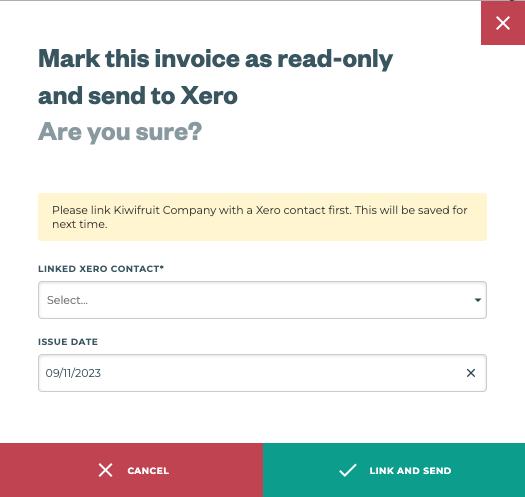
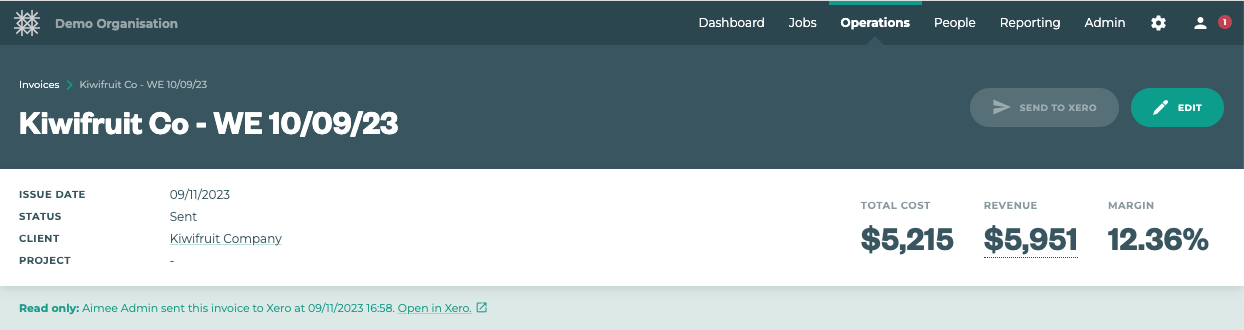
If you’re happy with the invoice lines you can send these to Xero which will create a draft invoice in your Xero account.
Once sent, the invoice will be locked, preventing further edits that may cause discrepancies between Tātou and Xero.
Linked Xero Contact: If the client hasn’t been connected, please match them with your Xero contact list.
Issue date: This is editable and will default to the day of sending.
Success!
The invoice is now ‘read only’ and a handy link to see the draft invoice in Xero is provided.
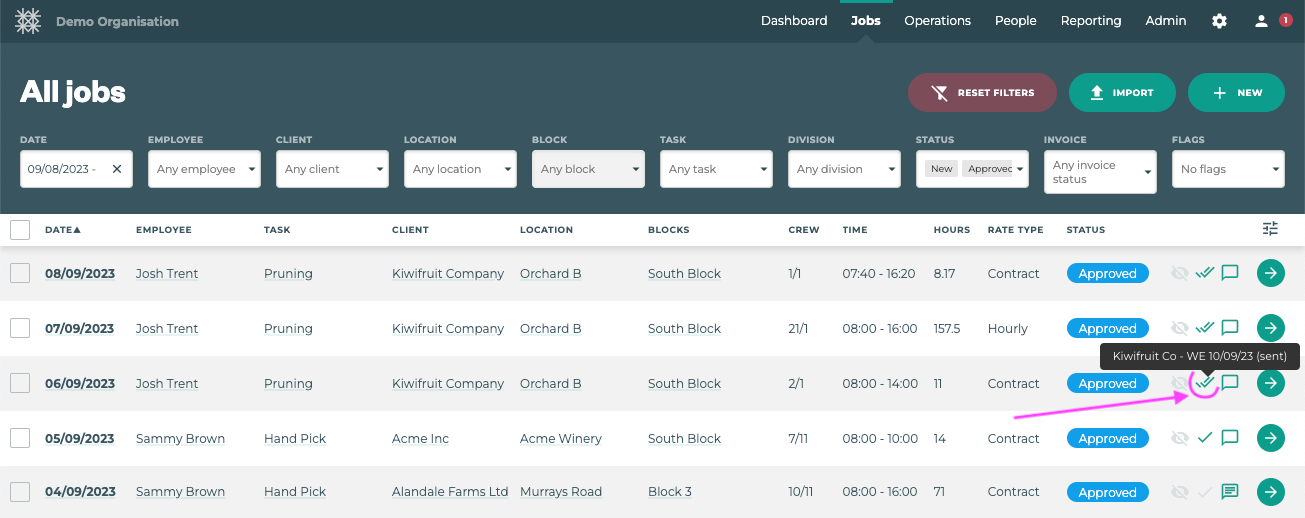
Invoice check
Check which jobs have been invoiced (or not) on the Jobs Menu → All Jobs screen or in Projects > Project > Jobs tab
-
Single grey tick = no invoice
-
Single green tick = Invoice attached
-
Double green tick = Invoice sent
You can filter jobs by ‘Invoice’ status, as highlighted below.
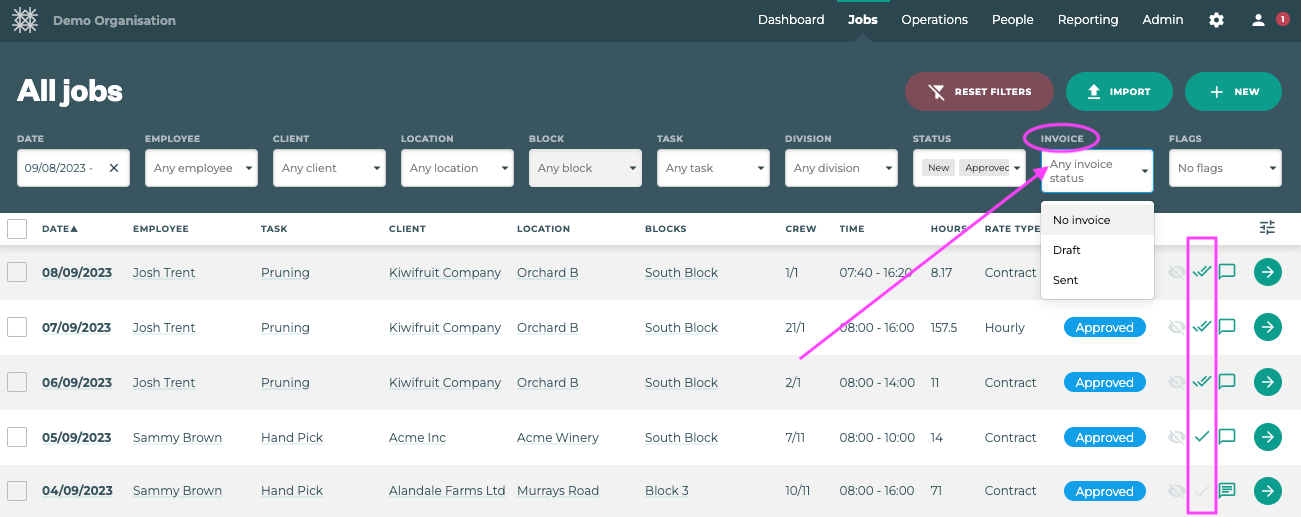
Hover on the invoice status (tick/s) to see the invoice name and click to view the invoice.
Reporting
Login to Tātou Office and navigate to Reporting → Exports. Choose from the following options;
-
Invoices export includes a summary of every invoice in your account
-
Jobs export includes an invoice status for each job and total sales value. Filter by any date range.
Made a mistake?
If you need to make changes to a sent invoice you can either;
-
Delete the invoice, which will ‘release’ the related jobs
-
Edit the jobs one-by-one removing the related invoice
The jobs will then be available to be added to a new invoice